Difference between revisions of "Creating a New AutoResponder Campaign"
| Line 10: | Line 10: | ||
You will be able to go back and make any changes to this information after your new campaign is created. | You will be able to go back and make any changes to this information after your new campaign is created. | ||
| + | |||
| + | * Campaign Nickname | ||
| + | |||
| + | * Signature Tokens | ||
| + | |||
| + | * CAN-SPAM Address | ||
| + | |||
| + | * Defining your Campaign Data | ||
| + | |||
| + | * Create an optional Confirmation Message | ||
| + | |||
| + | |||
| + | |||
== Video Tutorial == | == Video Tutorial == | ||
Revision as of 16:38, 4 March 2012
TrafficWave.net makes it easy to create a new autoresponder campaign with our Campaign Creation Wizard to walk you through each required step.
Campaign Creation Wizard
- Click Campaign Manager in the AutoResponder section of your back office.

- Click Create New Campaign on the left of your screen
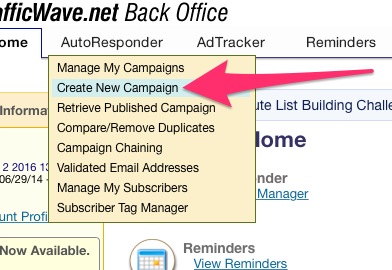


The system will walk you through a series of forms that will ask you for information relevant to creating your new AutoResponder campaign.
You will be able to go back and make any changes to this information after your new campaign is created.
- Campaign Nickname
- Signature Tokens
- CAN-SPAM Address
- Defining your Campaign Data
- Create an optional Confirmation Message